Deploy your WebApp to Azure App Service through Local Git.
Summary: In this tutorial, you will learn how to deploy your AspNet Mvc project to Azure App Service using our Local git.
Azure App Service is a platform as a service (PAAS) offering from Microsoft Azure that allows you to deploy Webapps, Mobile backends, and Restful APIs in any programming language of your choice without managing infrastructure.
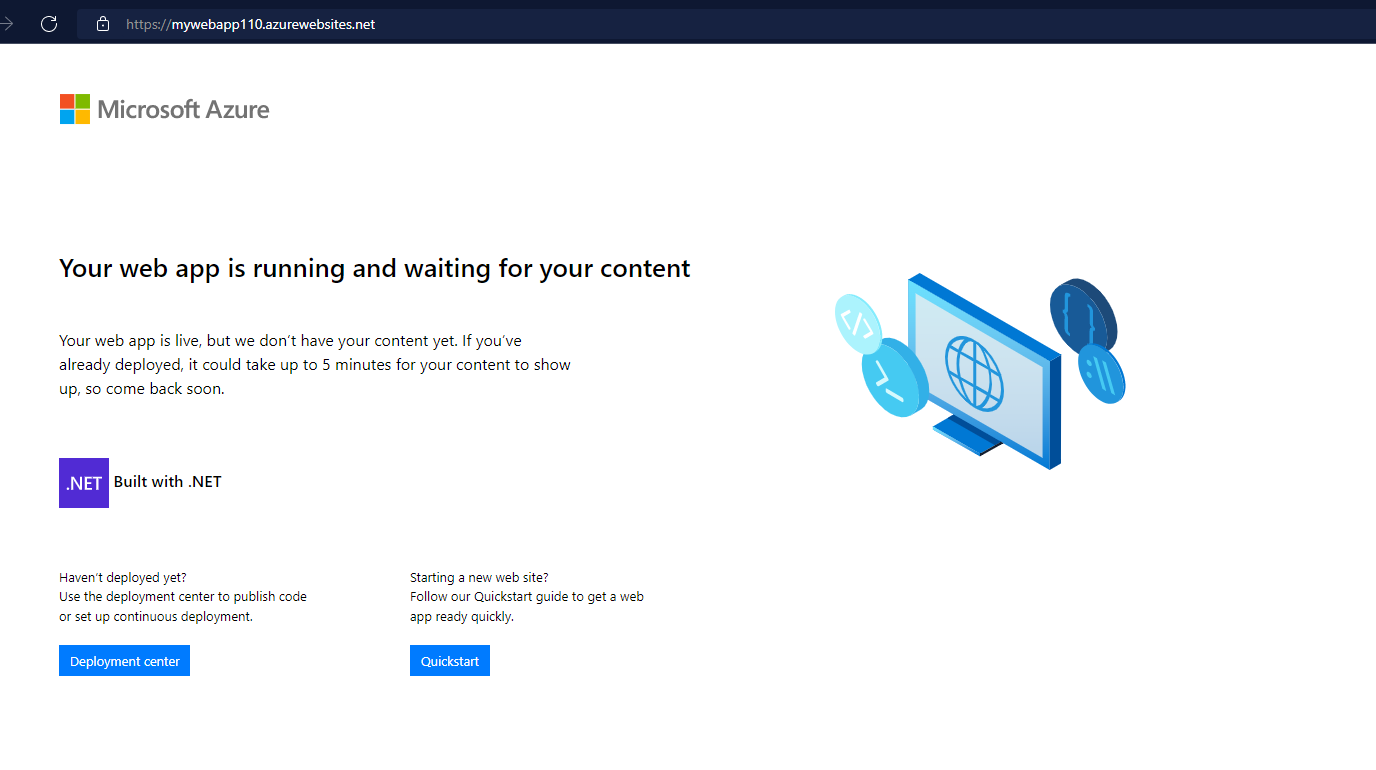
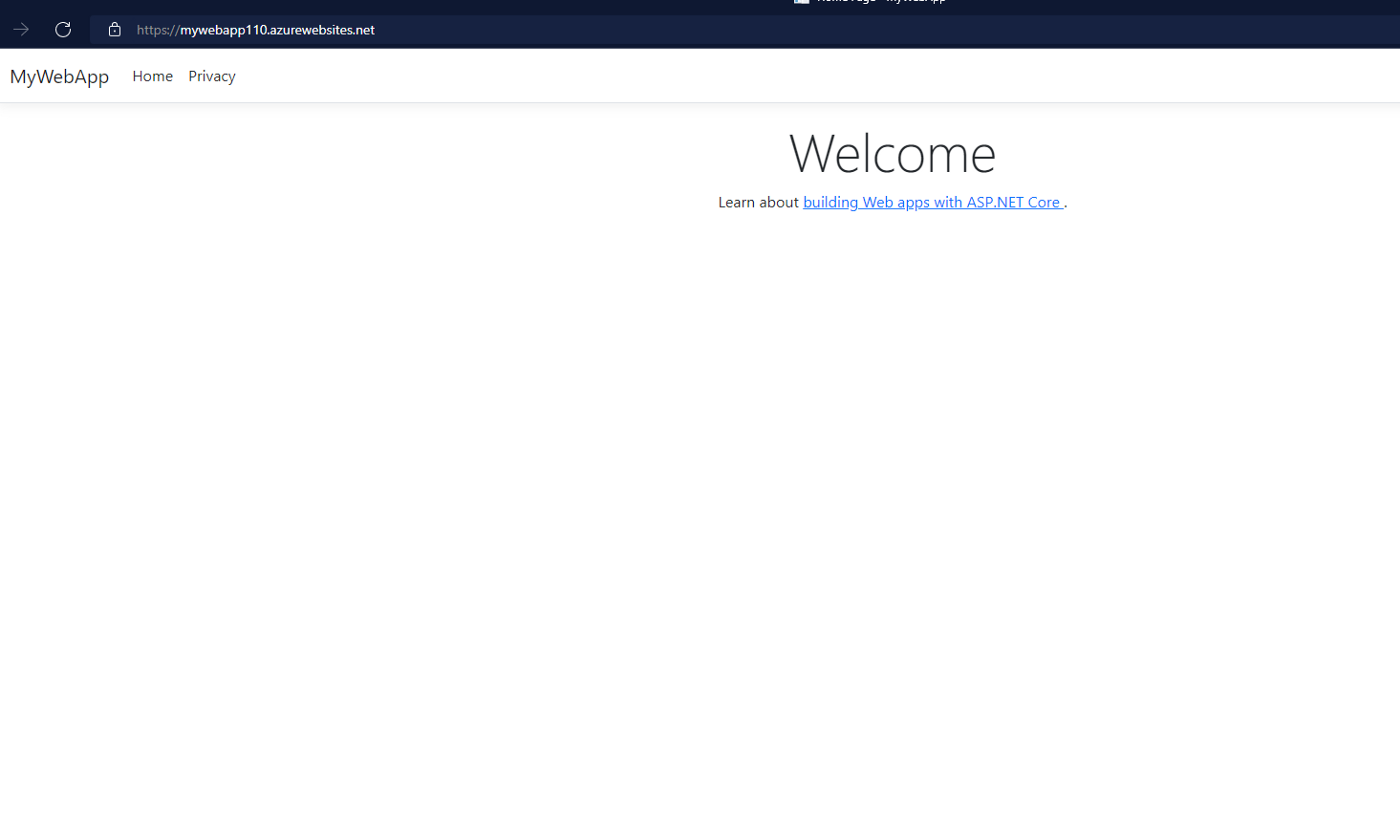
The following illustration shows the deployed application.

Prerequisites
- Visual Studio Code
- C# for Visual Studio Code (latest version)
- .NET 6.0 SDK
- Active Azure Account
- Github Account
We have the source code on this repository. The source code is a basic AspNet MVC project so you could create one and use that for this tutorial.
Excersice 1: Create Azure App Service on Azure
Sign in to your Azure account at https://portal.azure.com. If you do not already have one, create an account to get a $200 Azure credit. You’ll have 30days to use this credit in addition to free resources available on the portal.
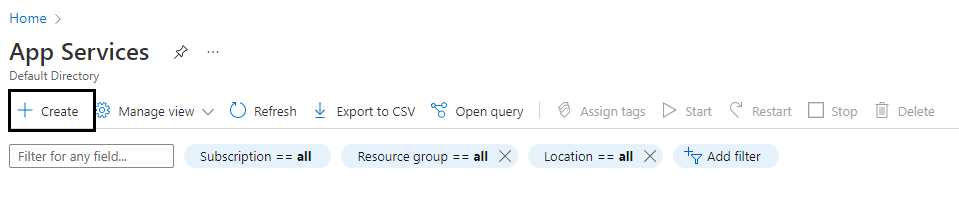
When signed in, Go to the App Service Deployment page. then click on create.
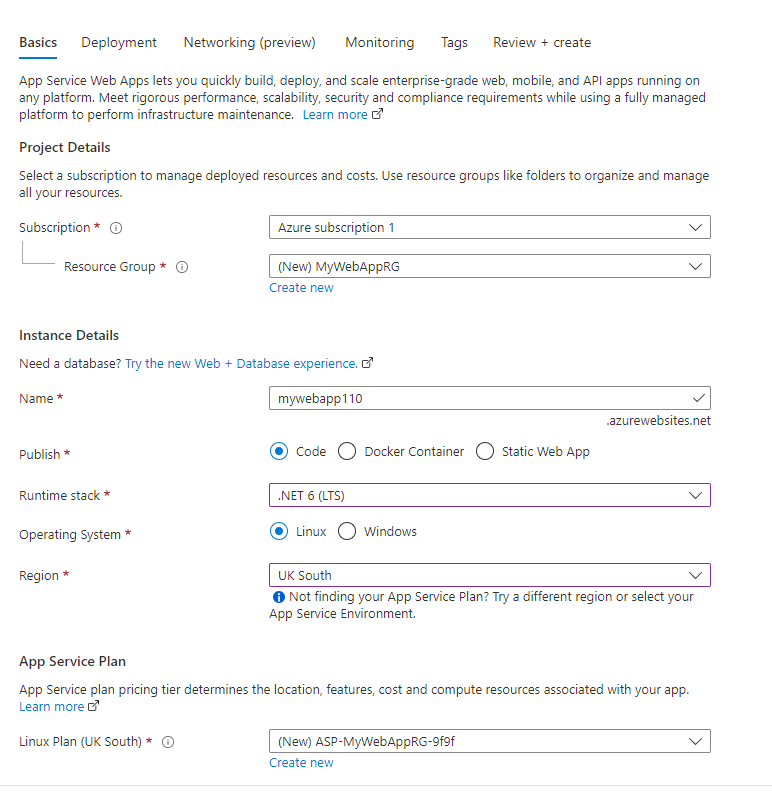
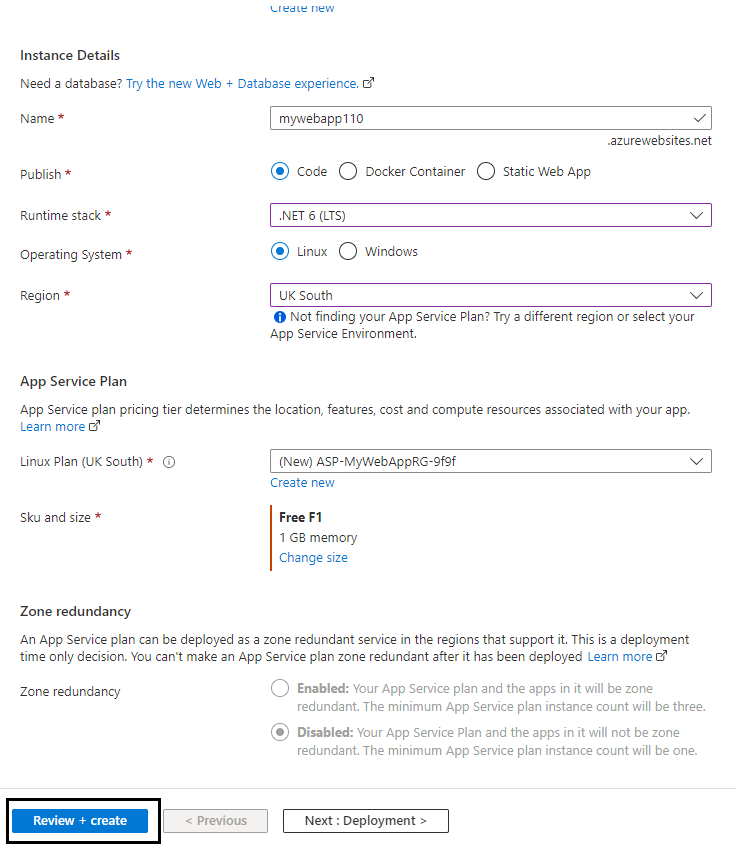
On the Basics Tab. Select your preferred Subscription. For the Resource group, click on Create new and type in MyWebAppRG. In the Instance Details section, type in mywebapp110 (or a different name) for the Name which has to be unique as it would be used for the website URL upon completion. For Publish, leave as Code. For Runtime Stack, select .Net 6 (LTS) from the dropdown. You can also select whatever Runtime Stack you wish to use if you are deploying a different project. For Operating System, I would select Linux. For the Region, pick a location that is closest to you. At this point, your Basics tab should look exactly like this:
In the App Service Plan section, click Change size for Sku and size to select the preferred features and configuration for your deployed project. There are several specifications available as you can see below:
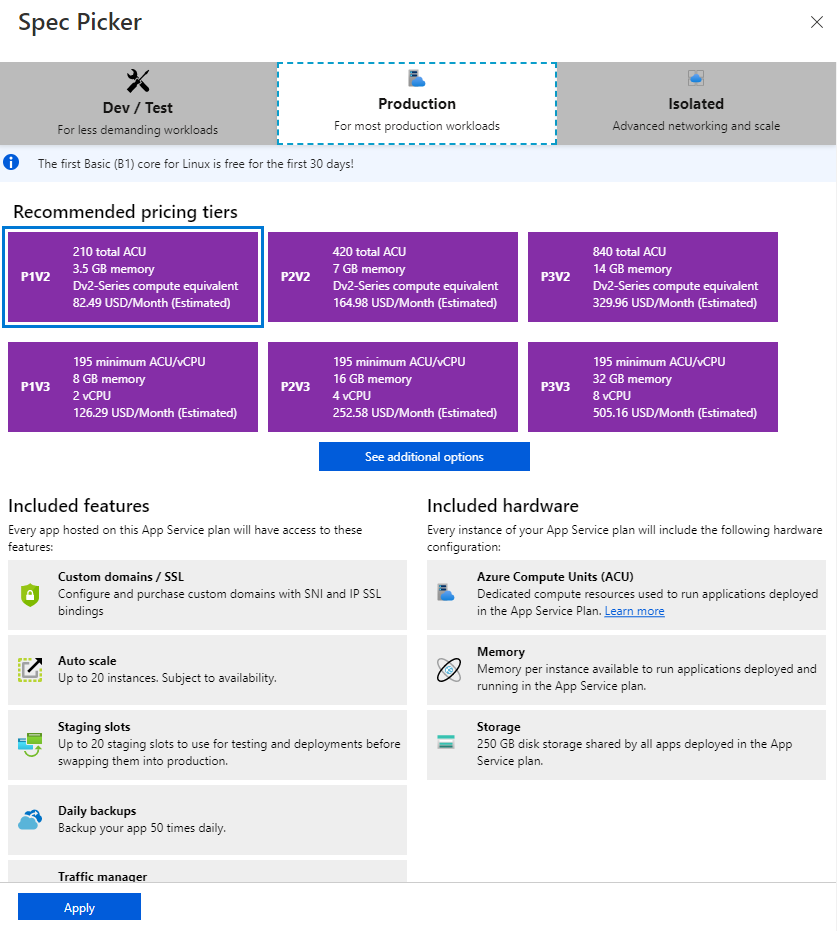
You can select whatever specification you prefer for your workload. However, since this is a test deployment. I would click on Dev/Test, then select either the F1 or B1 pricing tiers then Click Apply
Note that if you had picked any of the Specifications from the Production pricing tiers. You would have the option of enabling Zone redundancy which would allow your App service plan and the Apps in it to be zone redundant.
You can also configure Continuous Deployment through Github by going to the next tab Deployment. However, we want to deploy through our Local Git so click on Review + Create.
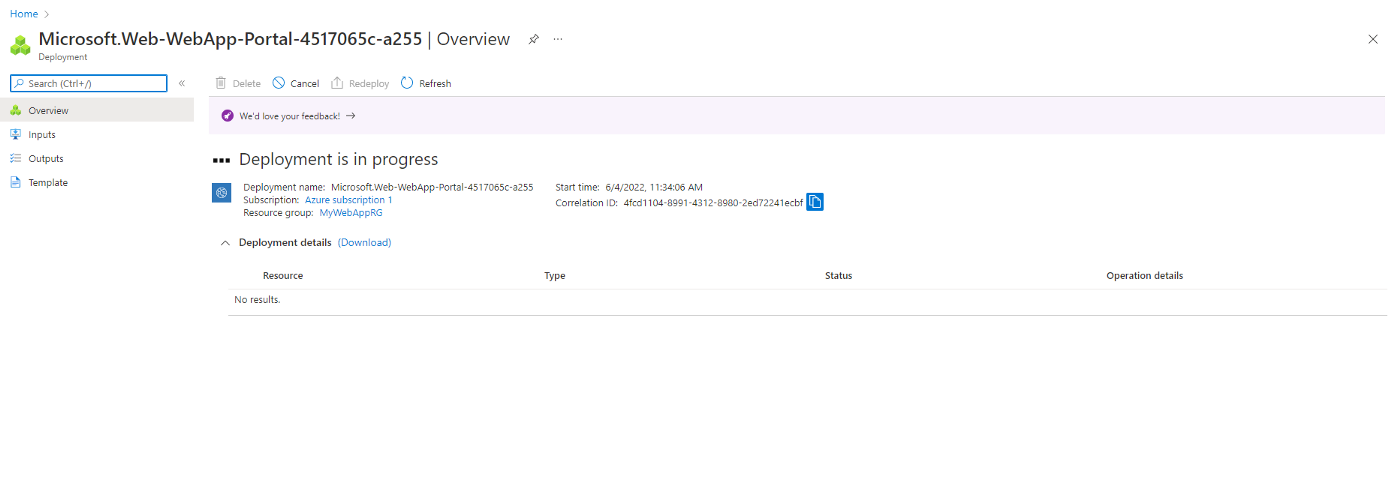
Review your configuration and click Create. Our Deployment is in progress now.
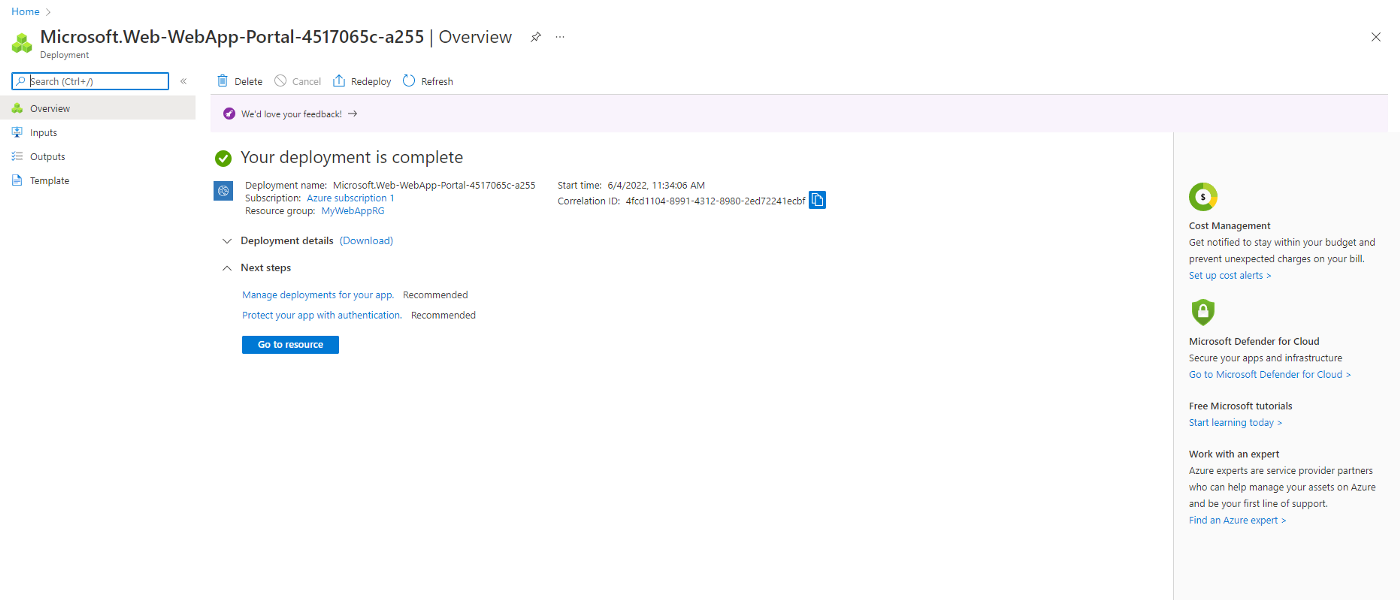
When our deployment is complete. We can click on Go to resource to access our deployed App Service without our project at this point.
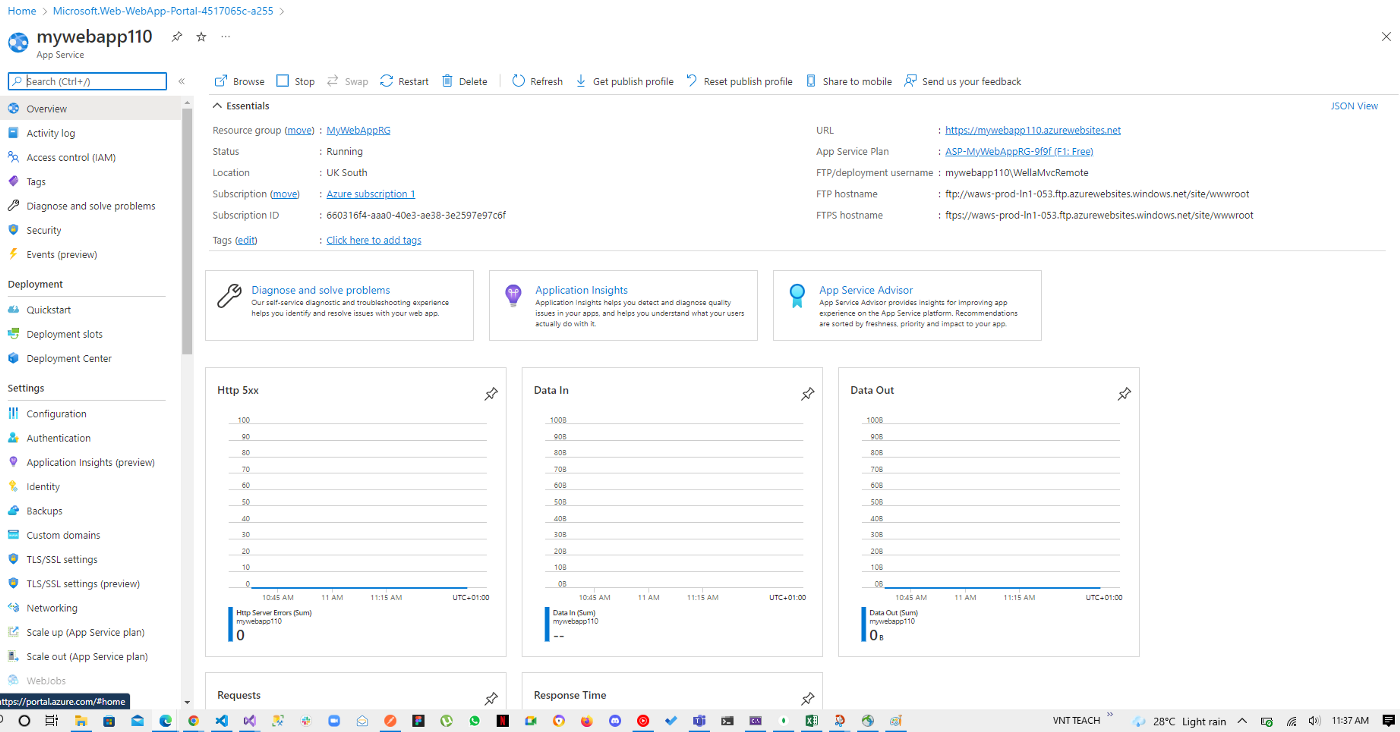
Below is the web page deployed by our App Service. If you used the exact name we used. You can access it on your browser with mywebapp110.azurewebsites.net or whatever URL is on your resource page.
Excersice 2: Deploy our project to App Service on Azure
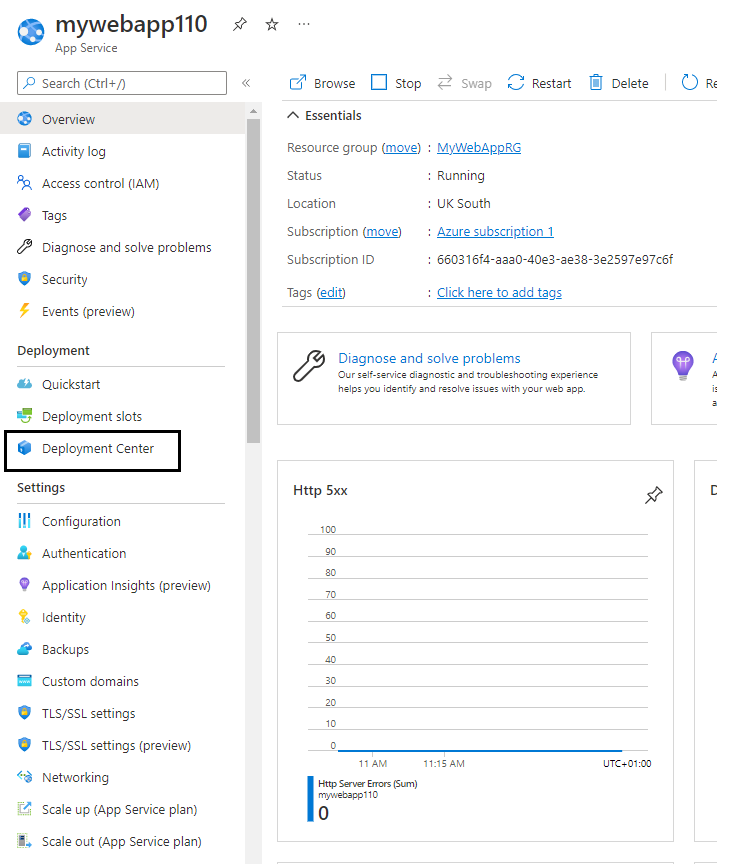
First, Open the cloned or created project on your Visual studio code then test that is building and running perfectly by using the command dotnet run. Next, make sure the project you wish you deploy is on the master branch. If not, create a branch called master it doesn’t already exist with “git checkout -b master” and then merge to the branch you have your project with “git merge < branch >”. When this is done, you have your files in the master branch. Go back to the App Service resource page, and click on Deployment Center on the left pane under the Deployment section.
In the settings tab, select Local Git in the dropdown for Source and click Save which will set up your deployment.
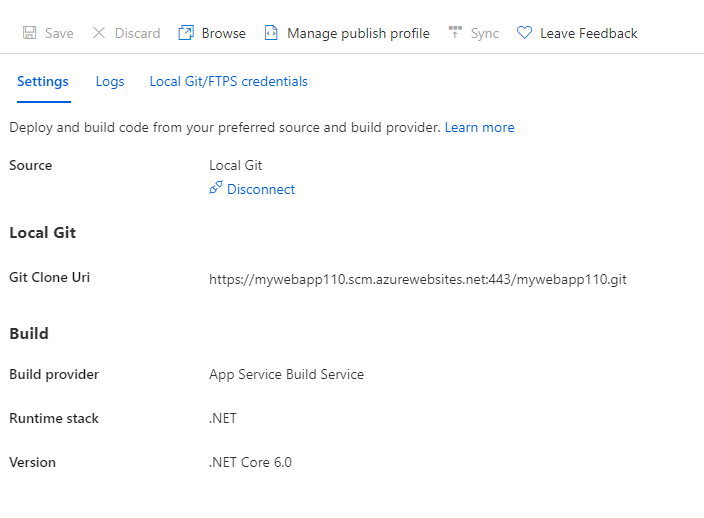
Next, copy the Git Clone Uri, then go to your Visual Studio code terminal. In the terminal, make sure you are in the directory of your project. Use the following command to add Azure to your project for remote access: “git remote add azure < Git Clone Uri >”.
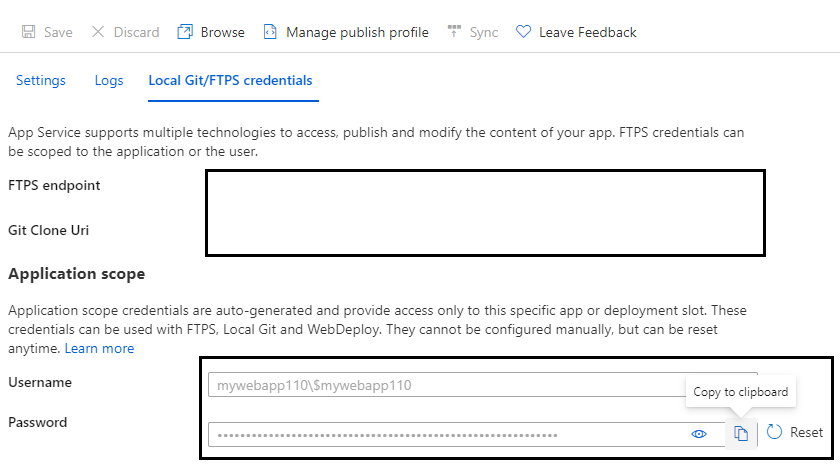
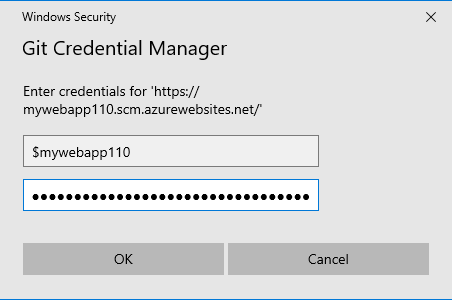
Next, go to the Local Git/FTPS credentials tab to access the credentials for deploying your project. You would need the Application Scope Username and Password auto-generated by Azure App Service.
Go back to your Visual Studio Code terminal. Type the following command “git push azure master” to deploy your code to the App Service. This will trigger a Windows security popup for Git credentials. On this popup, you’ll pass the auto-generated Username(starting after \ ) and Password then press Enter
If you input the right credentials, your project deployment would resume right there on your terminal. If it is successful, you’d get a Deployment successful as part of the logs displayed to you on your terminal. Now you can go on the Url given earlier (https://mywebapp110.azurewebsites.net/) or whatever URL is on your resource page to confirm your deployment.
In this tutorial, you have learned how to deploy a .Net 6 AspNet MVC application to Azure App Service using our Local Git. In a different article, we would show how to use Custom domains on our Azure App service.
Deploy your WebApp to Azure App Service through Local Git.
https://www.egabriel.dev/2022/06/18/azureappservicethroughlocalgit/